The Ultimate Guide to Remington Rand Model 9 Restoration
The Remington Rand Model 9 is a beloved and iconic vintage typewriter, known for its robust construction and distinctive appearance. This guide provides a comprehensive, step-by-step approach to restoring these machines, suitable for both experienced restorers and those new to typewriter repair. Whether you’re tackling a heavily used machine or a neglected example, this article will provide the knowledge you need. We’ll cover disassembly, cleaning, parts replacement, adjustments, and troubleshooting common problems.
Understanding the Remington Rand Model 9
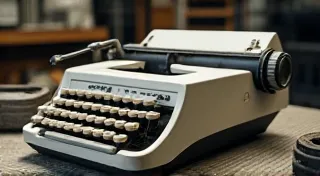
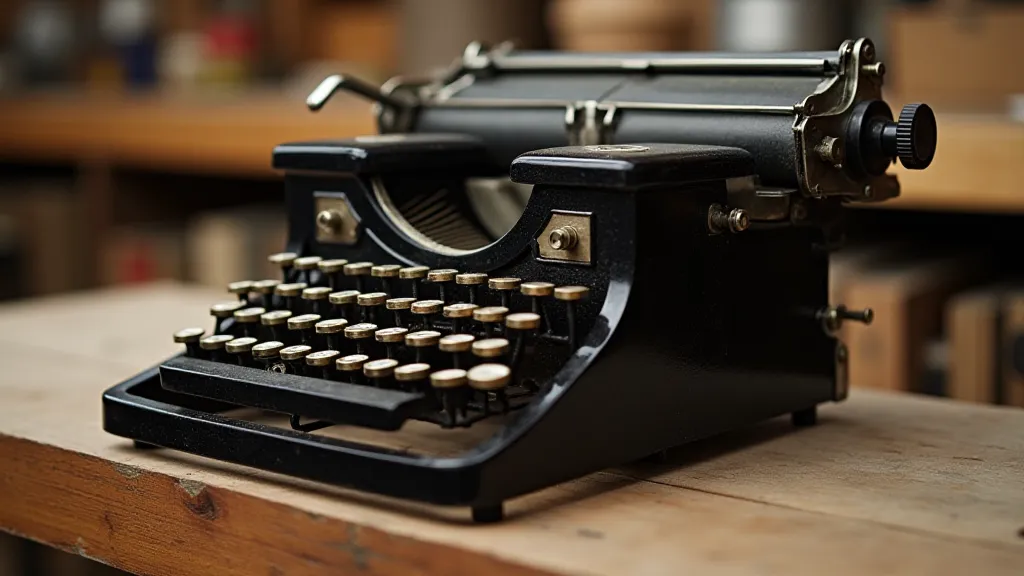
Before diving into the restoration process, it's vital to understand the machine itself. The Model 9 was produced from 1937 to 1953 and came in a variety of finishes, including black, grey, and olive green. Familiarize yourself with its components: the frame, carriage, platen, type bars, escapement mechanism, and ribbon mechanism. Identifying the serial number is important, as it can help determine the production year and any potential variations in design. The condition of the machine at the start of your project can vary greatly, and sometimes that means dealing with significant corrosion. Learning the principles of dealing with rust on vintage typewriters, even if the corrosion is minimal, can be invaluable.
Disassembly – The First Step
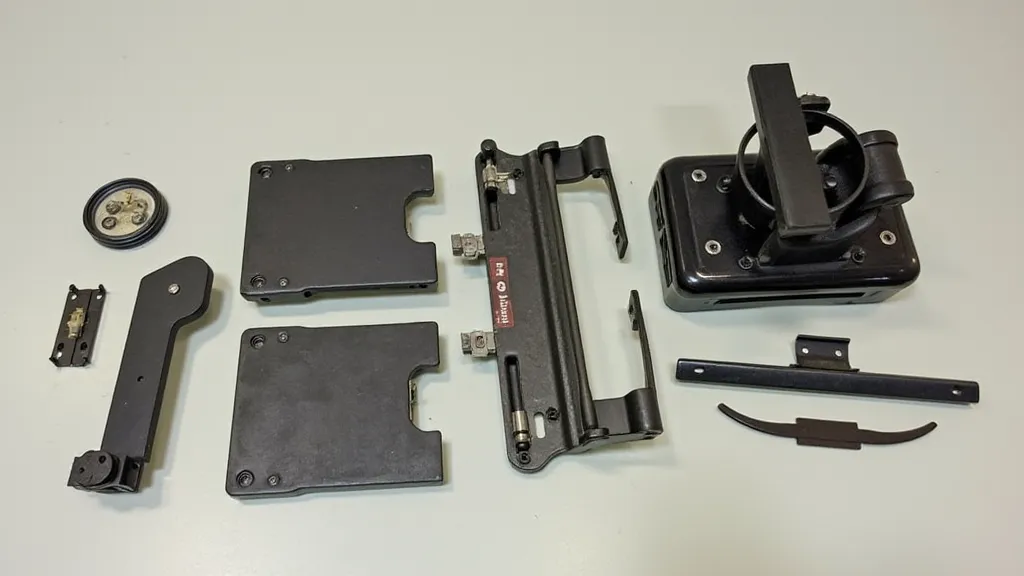
Careful disassembly is key to a successful restoration. Take photographs at each stage of the process - this is invaluable when reassembling the typewriter. A well-documented disassembly process is vital for preserving the integrity of the machine. Here’s a general approach:
- Remove the Case and Ribbon Spool: Carefully lift the case and remove the ribbon spool. Note the position of any felt or cushioning materials.
- Disassemble the Carriage: The carriage assembly will require loosening screws and carefully separating the various components. Pay close attention to the alignment of the escapement mechanism.
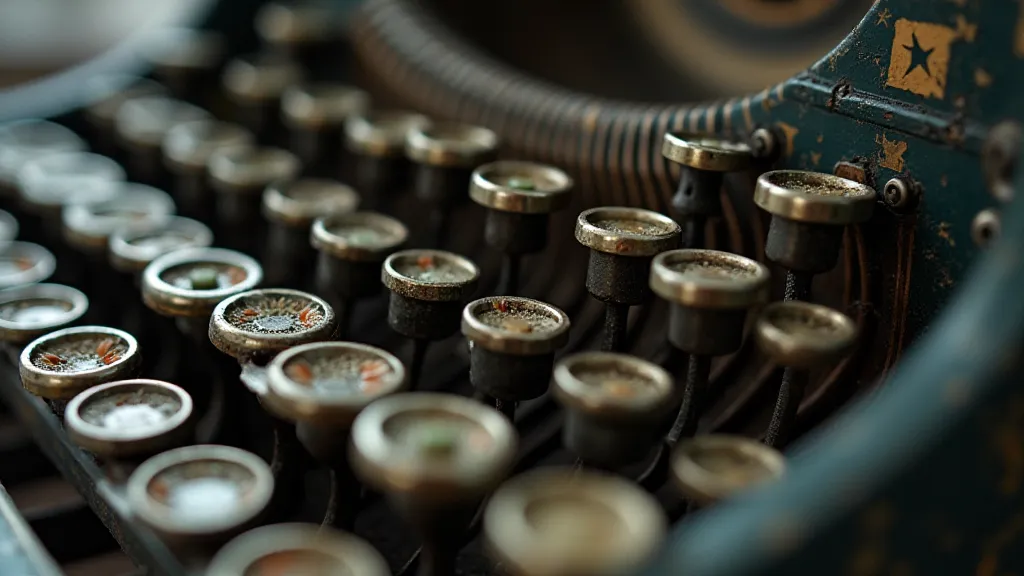
- Remove the Type Bars: Each type bar is secured to its lever. Note the order and orientation of each type bar – a numbered list or sketch can be helpful. Sometimes, the damage to type bars is quite severe, impacting their functionality.
- Detach the Platen Assembly: The platen is the rubber cylinder that the paper wraps around. Detach it from the frame, noting how it’s secured. The condition of the platen is often a significant factor impacting the overall quality of the restored machine.
Cleaning and Lubrication
Years of accumulated dust, dirt, and old oil can significantly impact a typewriter’s performance. Cleaning involves a multi-stage process: years of use and neglect often leave a layer of grime that can be challenging to remove. The appearance of these machines can also be impacted by ink stains and other residues, contributing to what some collectors refer to as a 'palimpsest' of history. Understanding how to address this, and appreciating the story it tells, is part of the restoration process. Cleaning involves a multi-stage process:
- Dust Removal: Use a soft brush and compressed air to remove loose debris.
- Solvent Cleaning: Use a gentle solvent (such as isopropyl alcohol diluted with water) to remove stubborn grime. Avoid harsh chemicals that can damage the finish or rubber components.
- Rust Removal: Light surface rust can be removed with fine steel wool or a rust remover. More severe rust may require specialized treatment.
- Lubrication: After cleaning, lubricate all moving parts with a light typewriter oil. Be careful not to over-lubricate.
Parts Replacement & Adjustments
During the restoration process, you may discover worn or damaged parts that need replacement. Common replacement parts include:
- Rubber Platen Cover: A new platen cover will restore proper impression. Finding the correct platen cover can be a challenge, requiring careful searching through vintage typewriter parts suppliers.
- Type Bars: Damaged or bent type bars must be replaced. Sometimes, sourcing these can be difficult, and a collector might even consider having new ones fabricated. Replacing these parts accurately requires precision, and knowing how to expert tips for typewriter key replacement helps understand the complexity of this process.
- Springs: Broken or weakened springs will affect the typewriter’s action.
- Ribbon Cartridge: Replace if damaged or dry
Adjustments are crucial for optimal performance. These may include:
- Type Bar Alignment: Ensure that each type bar strikes the platen correctly.
- Escapement Adjustment: The escapement mechanism controls the spacing between characters.
- Carriage Return Adjustment: The carriage must return smoothly and accurately.
Troubleshooting Common Issues
Here are some common problems encountered during Remington Rand Model 9 restoration:
- Typewriter Sticks: Often caused by dried lubricant or a binding escapement.
- Uneven Impression: May be due to misaligned type bars or a worn platen.
- Carriage Return Problems: Check the carriage return spring and lever.
- Jammed Keys: Often caused by a bent type bar or foreign object.
Beyond the common issues, you might find the typewriter has a more complex problem. The intricate design of the Model 9 requires patience and a methodical approach, and some collectors devote considerable time and resources restoring them to their original functionality.
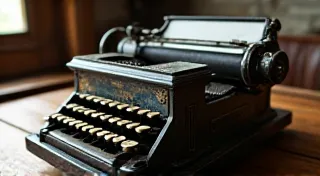
Preserving the Aesthetics
Restoring a Remington Rand Model 9 isn't just about mechanical functionality; it's also about preserving its visual appeal. The original finishes, like black or olive green, contribute significantly to the machine's character. Careful cleaning and, if necessary, a professional refinishing can breathe new life into these classic machines. If a previous owner attempted a hasty repair, the aesthetic damage can compound the technical challenges.
Final Thoughts
Restoring a Remington Rand Model 9 is a rewarding project that combines mechanical skill with historical appreciation. With patience, attention to detail, and this guide as your reference, you can breathe new life into these classic machines. Remember to take your time, document your work, and enjoy the process! The complexity of this process is comparable to other vintage machines, and restoring a Royal Quiet De Luxe offers a good comparative understanding of the challenges involved. Every successful restoration not only preserves a piece of history but also connects us to the craftsmanship and ingenuity of a bygone era.